Easy Origami Paper Umbrellas: Fun Step-by-Step Craft
How to Make Paper Umbrellas are a delightful little craft that brings a touch of sunshine, even on a rainy day! Imagine tiny, perfectly folded umbrellas, complete with delicate pleats and a sturdy little handle. They’re so charming and surprisingly simple to create. This tutorial is perfect for complete beginners, especially kids, and makes for the sweetest decorations or tiny gifts. In about 5-10 minutes per umbrella, you’ll be folding your way to a whole collection!
We’ll guide you step-by-step through the entire process, learning just a few key folds to transform a flat piece of paper into this adorable miniature marvel. Get ready to experience the joy of creating something beautiful with your own hands – it’s going to be so much fun!
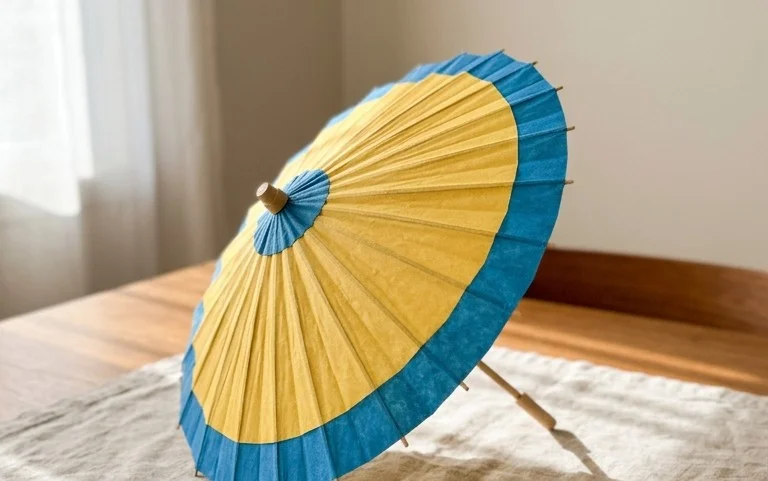
How to Make Paper Umbrellas – Easy Peasy and Fun!
Hello there, crafty friends! Today, we’re diving into the delightful world of origami to create something truly charming: paper umbrellas! These little beauties are surprisingly easy to make, incredibly satisfying, and can add a touch of whimsy to your life. Whether you’re looking for a fun craft project for a rainy afternoon, a unique decoration, or a thoughtful handmade gift, these paper umbrellas are perfect. No prior origami experience needed, I promise! We’ll go step-by-step, and I’ll guide you through every single fold. So, grab your paper, take a deep breath, and let’s get folding!
Choosing Your Perfect Paper
The paper you choose can make a big difference in how your umbrella looks and feels. For this project, I highly recommend starting with standard origami paper.
*
Type: Origami paper is ideal because it’s thin enough to fold cleanly, yet strong enough to hold its shape. It’s also designed to be crisp, which helps with sharp creases. Regular printer paper can work in a pinch, but it’s a bit thicker and might be trickier for beginners to get those sharp folds.
*
Weight: Origami paper typically comes in weights around 60-80 gsm (grams per square meter). This is a good weight for this project. Avoid very thick cardstock, as it will be difficult to fold precisely.
*
Size: For your first few umbrellas, I suggest starting with a square piece of paper that is 6 inches (15 cm) by 6 inches (15 cm). This is a common size for origami paper and is easy to handle. You can experiment with larger or smaller sizes later once you’re comfortable.
*
Single or Double Sided: For our umbrellas, I prefer to use single-sided origami paper. This means one side is coloured or patterned, and the other is white. When we fold, the white side will become the inside of the umbrella’s canopy, giving it a clean, finished look. If you only have double-sided paper, that’s perfectly fine too! It will just make the inside of your umbrella colourful, which can also be lovely.
The Base Folds: Building Blocks of Your Umbrella
Before we start transforming our square into an umbrella, we need to make a couple of fundamental folds. These are super important for creating the structure and ensuring your umbrella opens nicely.
1.
The Diagonal Fold: Start with your square piece of paper. If you’re using single-sided paper, place it in front of you with the coloured or patterned side facing *down*, and the white side facing *up*. Take the bottom-left corner and bring it up to meet the top-right corner. Align the edges and corners as perfectly as you can. Once they are aligned, run your finger firmly along the edge where the two halves meet to create a sharp crease. Unfold the paper. You should now have a diagonal crease running from one corner to the opposite corner. Now, take the bottom-right corner and bring it up to meet the top-left corner. Again, align the edges and corners precisely. Crease this fold firmly. Unfold the paper. You should now have two diagonal creases forming an ‘X’ across your square.
2.
The Horizontal/Vertical Fold: Now, with the coloured side still facing down (white side up), take the bottom edge and bring it up to meet the top edge. Align the corners and edges perfectly. Crease this fold firmly. Unfold. You should now have a horizontal crease across the middle of your square. Finally, turn your paper over so the coloured or patterned side is facing *up*. Take the left edge and bring it over to meet the right edge. Align the corners and edges precisely. Crease this fold firmly. Unfold. You should now have a vertical crease down the middle of your square.
You’ve just made all the necessary base folds! You should now have a square with an ‘X’ crease pattern and a ‘+’ crease pattern, all intersecting in the center.
Step-by-Step: Folding Your Paper Umbrella
Now for the magic! Follow these steps carefully, and you’ll have a delightful paper umbrella in no time. Remember, that patient, gentle pressure is key to crisp folds.
1.
Initial Setup: Start with your paper coloured side *down* (white side up), so the diagonal creases are slightly raised and the horizontal/vertical creases are slightly indented. It should look like a slightly puffed-up plus sign. Pinch the two opposite indented folds (the horizontal and vertical ones) towards the center.
2.
Forming the Base Triangle: Bring the two opposite indented edges together so they meet in the middle. As you do this, the paper will naturally want to collapse. You’re essentially squashing the square down into a triangle. You should end up with a shape that looks like a triangle sitting on top of a smaller square. The point where all the folds meet should be at the top. Make sure the edges of the triangle are aligned neatly and crease the edges firmly.
3.
Positioning for the Next Fold: Now, orient your triangle so the longest edge is at the bottom, and the single point is at the top. The open flaps should be at the bottom. You should have two layers of paper on each side.
4.
Folding the First Layer Up: Take the bottom-left corner of the *top* layer only. Bring this corner up towards the top point of the triangle, but don’t bring it all the way. You want to align this corner with the center point of the top edge of the triangle. Crease this fold firmly. This will create a sort of flap on one side.
5.
Folding the Second Layer Up: Now, turn the entire model over. You’ll see the same triangle shape. Take the bottom-left corner of this layer (which is now the ‘top’ layer on this side). Bring this corner up to meet the center point of the top edge of the triangle, just like you did on the other side. Crease this fold firmly. You should now have two flaps pointing upwards, one on each side.
6.
Bringing the Sides Together: Look at the two flaps you just created. They should be lying flat. Now, take the rightmost edge of the *top* flap on the front side and bring it across to meet the center crease line. Crease this fold firmly. Do the same for the leftmost edge of the *top* flap – bring it across to meet the center crease line. Crease firmly. You’ve just folded the sides of the flap inwards, creating a narrower, more pointed shape.
7.
Repeat on the Other Side: Turn the model over. You’ll see the same triangle shape. Repeat step 6 on this side: take the rightmost edge of the top flap and bring it to the center crease line, creasing firmly. Then, take the leftmost edge of the top flap and bring it to the center crease line, creasing firmly. You should now have a shape that resembles a kite or a diamond, with two points at the bottom and a single point at the top.
8.
The Final Fold: Now, look at the bottom points of your kite shape. You should have two layers of paper at the bottom on each side. Take the rightmost bottom point of the *front* layer and fold it upwards, tucking it into the pocket created by the folds you made in step 6. You might need to gently open up that pocket a little. Ensure the point goes all the way up and tucks in securely. Crease firmly. Turn the model over and repeat this with the rightmost bottom point on this side, tucking it into the pocket. This is what holds your umbrella together!
9.
Opening the Umbrella: Gently hold the top point of your umbrella. You should see a small opening at the very top where the points were tucked in. If you gently pull the sides of the umbrella outwards from the bottom, it should start to open up into a lovely umbrella shape! You can gently adjust the pleats to make them even.
Congratulations, you’ve made a paper umbrella! Isn’t it satisfying?
Common Pitfalls and How to Avoid Them
Even with the best intentions, beginners can sometimes run into a few snags. Here are the most common places people go wrong and how to steer clear of them:
*
Messy Base Folds: This is by far the most common issue. If your initial diagonal and horizontal/vertical folds aren’t precise, your whole umbrella will be a bit wonky.
* How to Avoid: Take your time with these first few folds. Align corners and edges perfectly *before* you crease. Use your fingernail or a bone folder (if you have one) to make very sharp, crisp creases. Think of these as the skeleton of your umbrella; a strong skeleton leads to a strong umbrella.
*
Not Folding on the Correct Layer: In steps 4, 5, 6, and 7, it’s crucial to fold only the *top* layer of paper. If you accidentally fold both layers, your umbrella won’t open properly or will look uneven.
* How to Avoid: Pay close attention to which layer you’re folding. When folding the flaps up in steps 4 and 5, make sure you’re only lifting and folding the single top layer. Similarly, when bringing the edges to the center in steps 6 and 7, ensure you’re only manipulating the top flap.
*
Not Securing the Final Fold Properly (Step 8): This is the step that keeps your umbrella from popping open prematurely. If the bottom points aren’t tucked in securely, the umbrella might not hold its shape well.
* How to Avoid: When tucking the bottom point into the pocket, make sure you get the point all the way into the pocket and crease it firmly. You might need to gently prise open the pocket slightly with your fingernail to help it slide in. Once tucked, press down firmly to secure it.
Don’t worry if your first few attempts aren’t perfect. Every origami artist started somewhere, and practice makes perfect!
Varying Your Umbrella Designs
Once you’ve mastered the basic umbrella, you can have loads of fun experimenting with variations!
*
Size: Simply start with a larger or smaller square piece of paper. A 3-inch square will make a tiny, adorable umbrella, while a 12-inch square will create a more substantial one.
*
Paper Pattern: This is where you can really let your creativity shine! Use paper with floral prints, geometric designs, polka dots, stripes, or even solid colours. For a themed party, you could use paper in your event’s colours.
*
Colour: Beyond patterned paper, you can also experiment with different colour combinations. Use a bright, cheerful colour for a summer party, or elegant metallics for a more sophisticated touch. You can even layer two colours by gluing a smaller coloured square onto the white side of your origami paper before you start folding – this will make the inside of your umbrella a surprise!
*
Adding a Handle: For a more complete look, you can create a simple handle. Cut a thin strip of cardstock or a pipe cleaner, and gently glue or tape it to the bottom point of your umbrella. You can bend the pipe cleaner into a hook shape!
Displaying and Gifting Your Paper Umbrellas
These little umbrellas aren’t just fun to make; they’re also wonderful for decorating and gifting!
*
Party Decorations: String them together to make a garland for a birthday party, baby shower, or tea party. They look fantastic hanging from the ceiling or draped across a table.
*
Table Settings: Place one at each guest’s setting for a charming touch at a dinner party or wedding. You can even tuck a small tag with a name or a thank you message inside.
*
Craft Projects: Glue them onto cards, scrapbook pages, or gift boxes for an extra special embellishment.
*
Sensory Play: For younger children, the opening and closing action can be fascinating (with supervision, of course!).
*
Gifts: They make wonderful small gifts for friends, teachers, or anyone who appreciates handmade treasures. You can present them in a small box or bag, or even attach them to a larger gift.
I hope you’ve enjoyed this tutorial and are feeling inspired to create your own collection of paper umbrellas. They’re such a simple pleasure, and the possibilities are endless. Happy folding, and I hope your day is as bright and cheerful as a beautiful paper umbrella!

Conclusion
Congratulations! You’ve just learned how to make your very own paper umbrellas. We hope you found this origami tutorial to be as easy peasy and fun as we intended. Don’t worry if your first attempt isn’t perfect; that’s what practice is for! We encourage you to keep folding and soon you’ll be creating beautiful paper umbrellas with ease. Consider sharing your finished models with friends and family – they make adorable decorations!
Ready for more? Why not try making a few tiny umbrellas to create a whimsical garland, or perhaps use patterned paper for a truly unique look? The possibilities are endless!
We hope you enjoyed this project. Don’t stop here – there are so many other wonderful paper crafts waiting for you to explore!
