Easy Flextangle Paper Toy: Step-by-Step Origami
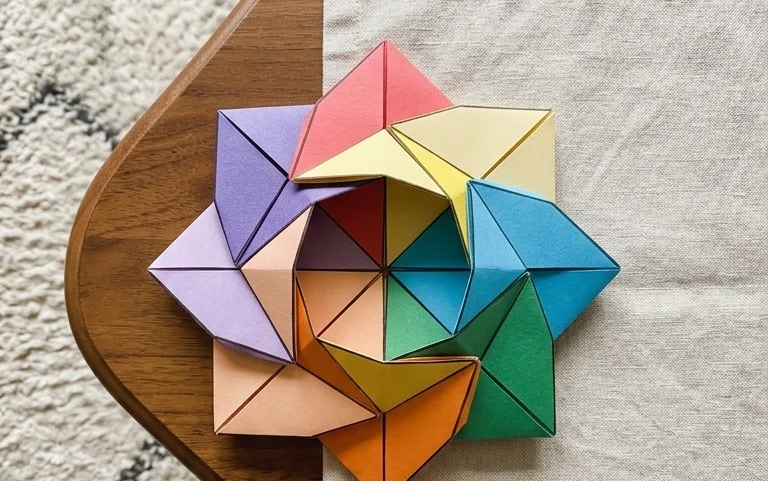
Flextangles are endlessly fascinating paper toys that, once folded, create a mesmerizing, ever-changing geometric shape. Imagine a clever cube that, with a gentle squeeze or twist, transforms into a whole new configuration! It’s a little bit magic, a little bit mathematical, and a whole lot of fun. This project is absolutely perfect for complete beginners and kids alike, and it makes a fantastic, unique gift or a fun desk decoration. You can create your first flextangle in under an hour! In this tutorial, I’ll guide you step-by-step through the simple folds and tucks needed to bring this amazing shape to life. Get ready to discover the joy of creating something that seems to defy its own form!
The Delightful World of Flextangles: A Paper Toy Adventure
Hello, fellow paper enthusiasts! Today, we’re diving into the wonderfully wiggly world of flextangles. These aren’t your average origami models; they’re dynamic, kinetic paper toys that seem to defy gravity with their mesmerizing movements. Perfect for a bit of desk fidgeting, a unique gift, or just a fun afternoon crafting session, flextangles are surprisingly accessible once you get the hang of them. I’m here to guide you through every step, patiently explaining each fold so you can create your own endlessly entertaining paper marvel.
Choosing Your Canvas: The Right Paper for Flextangles
The paper you choose can make a real difference in how your flextangle behaves. For your first few flextangles, I recommend starting with standard A4 or US Letter sized paper. This size is common and easy to work with.
Paper Type and Weight
A good all-around choice is regular printer paper, often around 70-80 gsm (grams per square meter). It’s sturdy enough to hold its shape without being too stiff to fold, and it’s readily available. If you want a more substantial feel or a flextangle that can withstand a bit more enthusiastic flexing, you could try slightly heavier paper, like 90-100 gsm cardstock. However, be mindful that very thick cardstock can become difficult to fold precisely, especially for the smaller folds. Avoid very thin paper like tissue paper, as it won’t have the structural integrity needed for the flextangle’s mechanics.
Single vs. Double-Sided Paper
For a basic flextangle, single-sided paper is perfectly fine. You’ll be folding it in such a way that the coloured or patterned side will be visible on the outside of the finished model. However, double-sided paper can add an extra layer of visual interest. Imagine a flextangle that has a different colour on each side as it twists and turns – it’s a lovely effect! If you’re using patterned paper, double-sided patterns can be particularly stunning.
The Foundation: Essential Base Folds
Before we get into the specific flextangle sequence, let’s master a couple of fundamental folds that are crucial for clean, accurate results.
The first is the **valley fold**. Imagine you’re folding a piece of paper in half, bringing one edge to meet another edge, and you’re creating a crease on the side that dips inwards, like a valley. To make a clean valley fold, carefully align the edges or corners you are bringing together. Run your fingernail or a bone folder firmly along the fold line to create a sharp crease.
The second is the **mountain fold**. This is the opposite of a valley fold. Instead of the crease dipping inwards, it pops outwards, like the peak of a mountain. You’ll often create mountain folds by first making a valley fold and then unfolding the paper, or by folding in the opposite direction of an existing crease. Again, precision in alignment and a firm crease are key.
The Flextangle Sequence: A Step-by-Step Guide
Now, let’s get folding! We’re going to make a common and classic flextangle design. Imagine you have your paper positioned in front of you in landscape orientation (wider than it is tall). The coloured side, if you’re using single-sided paper, should be facing up.
1. **First Fold: Halving the Paper.** Take the right edge of the paper and bring it over to perfectly align with the left edge. Crease firmly from top to bottom. You now have a long, rectangular shape, half the original width.
2. **Second Fold: Halving Again.** With the paper still folded, take the top edge and bring it down to meet the bottom edge. Crease firmly. You now have a smaller square, one quarter of the original size.
3. **Third Fold: Diagonal Delight.** Unfold the last fold you made (the one bringing the top edge to the bottom). You should see a horizontal crease across the middle of your square. Now, take the bottom right corner of the paper and bring it up to meet the top left corner. Crease firmly along the diagonal.
4. **Fourth Fold: The Other Diagonal.** Unfold the paper again. You should now have two creases: a horizontal one in the middle and a diagonal one running from bottom right to top left. Now, take the bottom left corner and bring it up to meet the top right corner. Crease firmly along this second diagonal.
5. **Fifth Fold: Bringing it Together.** Unfold the paper completely. You should see four creases forming a diamond shape in the centre of your paper. Now, place the paper in front of you with the coloured side facing up. Take the bottom point of the diamond (where the diagonal creases meet the bottom edge) and bring it up to meet the centre point where all the creases intersect. Crease firmly.
6. **Sixth Fold: The Next Point.** Keeping the paper as it is, take the point on the right side of the diamond and bring it over to meet the centre point. Crease firmly.
7. **Seventh Fold: Another Point.** Now, take the point on the top of the diamond and bring it over to meet the centre point. Crease firmly.
8. **Eighth Fold: The Final Point.** Finally, take the point on the left side of the diamond and bring it over to meet the centre point. Crease firmly. You should now have a smaller square shape, with the four points of the original diamond folded into the centre.
9. **Ninth Fold: The Hidden Flap.** Turn the entire model over so the coloured side is now facing down. Look at the square you’ve created. You’ll see four triangular flaps pointing outwards. Take one of these flaps and fold it inwards, aligning its outer edge with the centre crease of that section. Crease firmly.
10. **Tenth Fold: Repeat on All Sides.** Repeat the previous fold (folding the flap inwards to the centre crease) for all four of the triangular flaps. Your model should now look like a smaller, more compact square.
11. **Eleventh Fold: The Crucial Turn.** This is a bit of a tricky one, so pay attention! Turn the model over again, so the coloured side is facing up. You should see a square with four little triangular points sticking out from the corners. Now, you need to unfold the last set of folds you made (the ones where you folded the flaps inwards). Unfold all four of those flaps so they are pointing outwards again, as they were before step 9.
12. **Twelfth Fold: The Pinch and Tuck.** This is where the magic happens! Hold the model so the coloured side is facing up. You’ll see the four points of the original diamond now folded into the centre. Gently pinch two opposite points together and then tuck one point under the other, creating a little overlap. You’re essentially folding the model in half, but in a specific way that allows it to flex.
13. **Thirteenth Fold: Completing the Tuck.** Now, do the same for the other pair of opposite points, pinching them together and tucking one under the other. You should now have a shape that resembles a slightly flattened, almost triangular prism with two points at each end.
14. **Fourteenth Fold: The First Flex!** Hold one end of your flextangle and gently press or pull it. You should see the flextangle expand and contract, creating its characteristic wobbly movement!
Common Pitfalls and How to Avoid Them
As with any origami, there are a couple of places where beginners can sometimes stumble.
* **Imperfect Creases:** The most common issue is not making your creases sharp and clean enough. This can lead to the flextangle not holding its shape or not flexing smoothly.
* **How to Avoid:** Be deliberate with your folds. Align edges and corners precisely before creasing. Use your fingernail, a ruler, or a bone folder to press down firmly along the entire length of each fold. Don’t be shy about making those creases crisp!
* **Misinterpreting the “Tuck”:** Steps 12 and 13, where you pinch and tuck the points, can be a little confusing. If your flextangle doesn’t seem to flex, or if it looks a bit lopsided, you might have misaligned these tucks.
* **How to Avoid:** Take your time with these steps. Look at how the points overlap. You want a neat, interlocking fold. Sometimes it helps to practice just this tucking motion a few times before incorporating it into the full flextangle. Ensure you are tucking one point *under* the other, creating a secure connection that allows for movement.
Unleash Your Creativity: Variations to Explore
Once you’ve mastered the basic flextangle, the world of possibilities opens up!
Size Matters
You can absolutely make flextangles of different sizes. Use larger paper for a bigger, more dramatic flextangle, or smaller paper for a daintier, more intricate one. Just remember to adjust your expectations for crease precision – smaller folds require even more care.
Paper Patterns and Colours
This is where you can really let your personality shine!
* **Patterned Paper:** Use scrapbook paper with fun designs, geometric patterns, or even illustrations. The way the patterns twist and shift as the flextangle moves is fascinating.
* **Colour Blocking:** Use paper that has different colours on each side. As the flextangle flexes, you’ll see flashes of different colours, creating a vibrant visual effect.
* **Solid Colours:** Simple, bold colours can also be very striking. Try a bright red, a deep blue, or a sophisticated black for a different aesthetic.
* **Crafting with Kids:** Let children choose their favourite patterned or coloured papers. They’ll have a blast making their own, and the tactile nature of the flextangle is very engaging for them.
Sharing the Joy: Displaying and Gifting Your Flextangles
Finished flextangles are more than just folded paper; they’re little kinetic sculptures that deserve to be admired.
* **Desk Buddies:** Place your flextangle on your desk as a delightful fidget toy. It’s a great conversation starter and a way to add a splash of colour and fun to your workspace.
* **Mobile Creations:** You can string several flextangles together with fishing line or thin thread to create a mobile that gently sways and moves.
* **Gifted Wonders:** Flextangles make fantastic, handmade gifts. They’re unique, affordable, and show you’ve put thought and effort into your present. Package them in a small box or a cellophane bag tied with a ribbon. You can even include a little note explaining what it is and how to flex it.
* **Party Favours:** For kids’ parties, flextangles are a fantastic alternative to sugary treats. They’re engaging, creative, and provide hours of entertainment.
Making flextangles is a journey of exploration and a wonderful way to engage with paper. Don’t be discouraged if your first few aren’t perfect. Each fold is a lesson, and with a little patience and practice, you’ll be creating a whole collection of these captivating paper toys in no time. Happy folding!
Conclusion
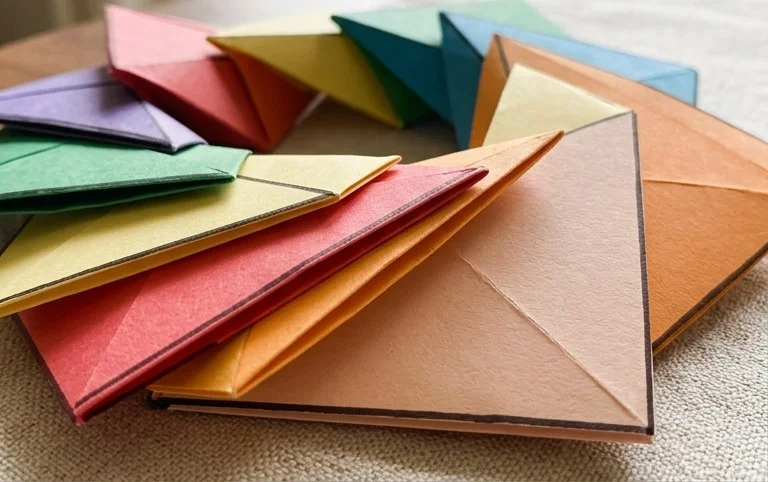
Congratulations on creating your very own Flextangle! We hope you enjoyed this fun paper toy project. Don’t worry if your first attempt isn’t perfect – that’s what practice is for! The beauty of these geometric wonders is that they become easier and more impressive with each fold. We’d love to see your finished Flextangles! Consider sharing them with friends or family and inspiring their own origami adventures.
Ready for More Fun?
For your next challenge, try making a Flextangle with different colored paper on each side, or experiment with using heavier cardstock for a more robust toy. There are so many possibilities to explore with paper folding. We invite you to discover even more delightful paper projects and continue your journey into the wonderful world of origami!
